

Reports
Reports
The Reports tab provides an overview of denial risk and other alerts across the checks you've made, and makes it easy to filter and sort your checks.
General Overview
Once you've run checks (either via Coverage Checker or the Coverage API), you'll be able to see all your checks in the Reports tab. The Reports tab provides the ability to:
- See a visual overview of denial risk and other alerts across all your checks
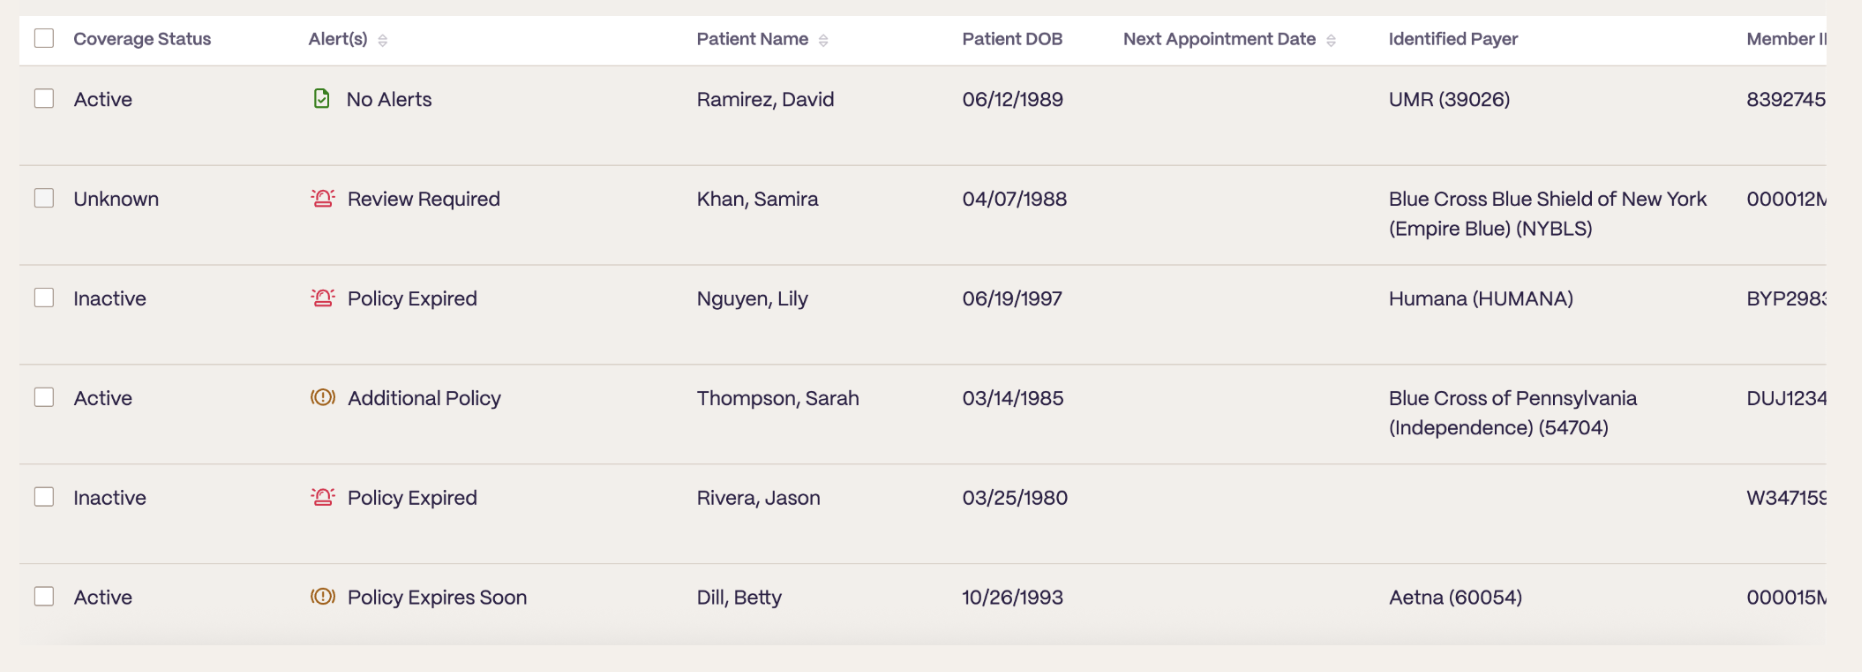
- See a table view of all your checks with customizability on what columns you see
- Filter and sort by alerts and other policy characteristics
- Select a policy and see what Nirvana's API returned
- Easily export to CSV to prioritize work for your billing team
Reports Visualizations
Once you open the Reports tab, you'll see a Reports visualization that gives you an overview of API performance and alerts across your checks:
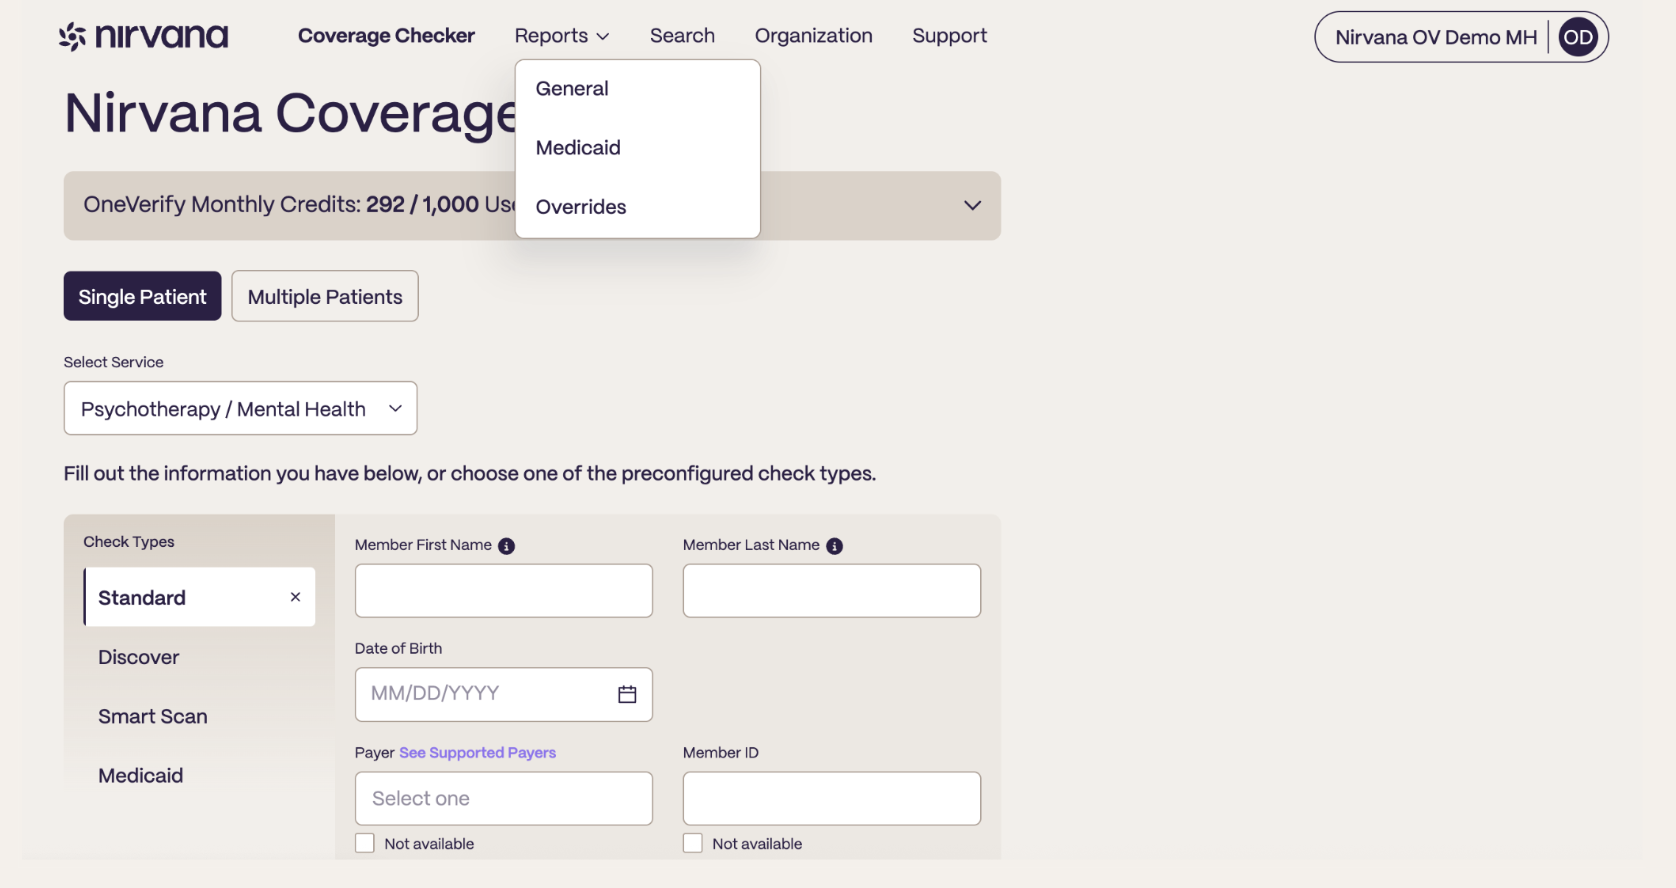
NoteWhich reports you have available to you will depend on which features your organization has opted into for OneVerify. We walk through the General Reports tab in this section, and walk through the Overrides Reports tab in the "Overrides" section below.
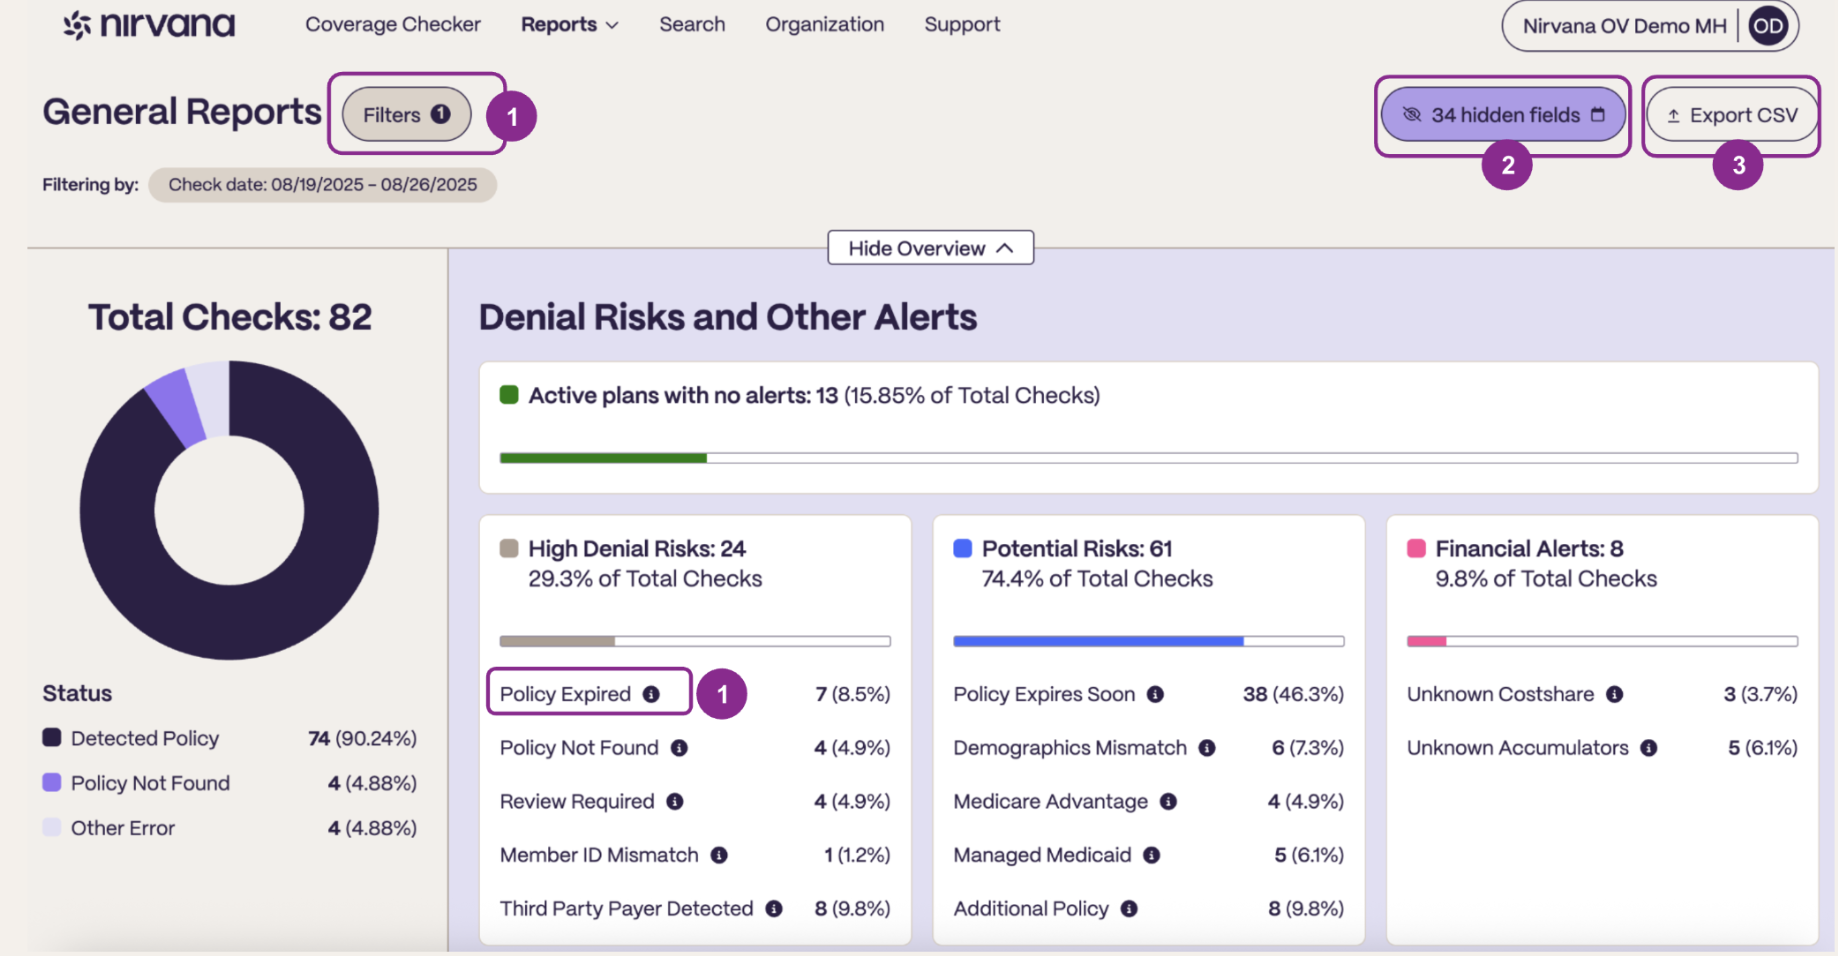
Once you click into the General Reports tab, you'll see a similar screen as below. From here you can:
-
Apply various filters to adjust which policies are shown in the report view (more on filters immediately below). There are two places to filter:
- Using the filter button at the top left corner
- Clicking any individual alert in the visualization
-
Adjust which fields are visible in the report's table view (below the visualization)
-
Export to CSV all policies filtered in the report
Understanding the Report Visualization
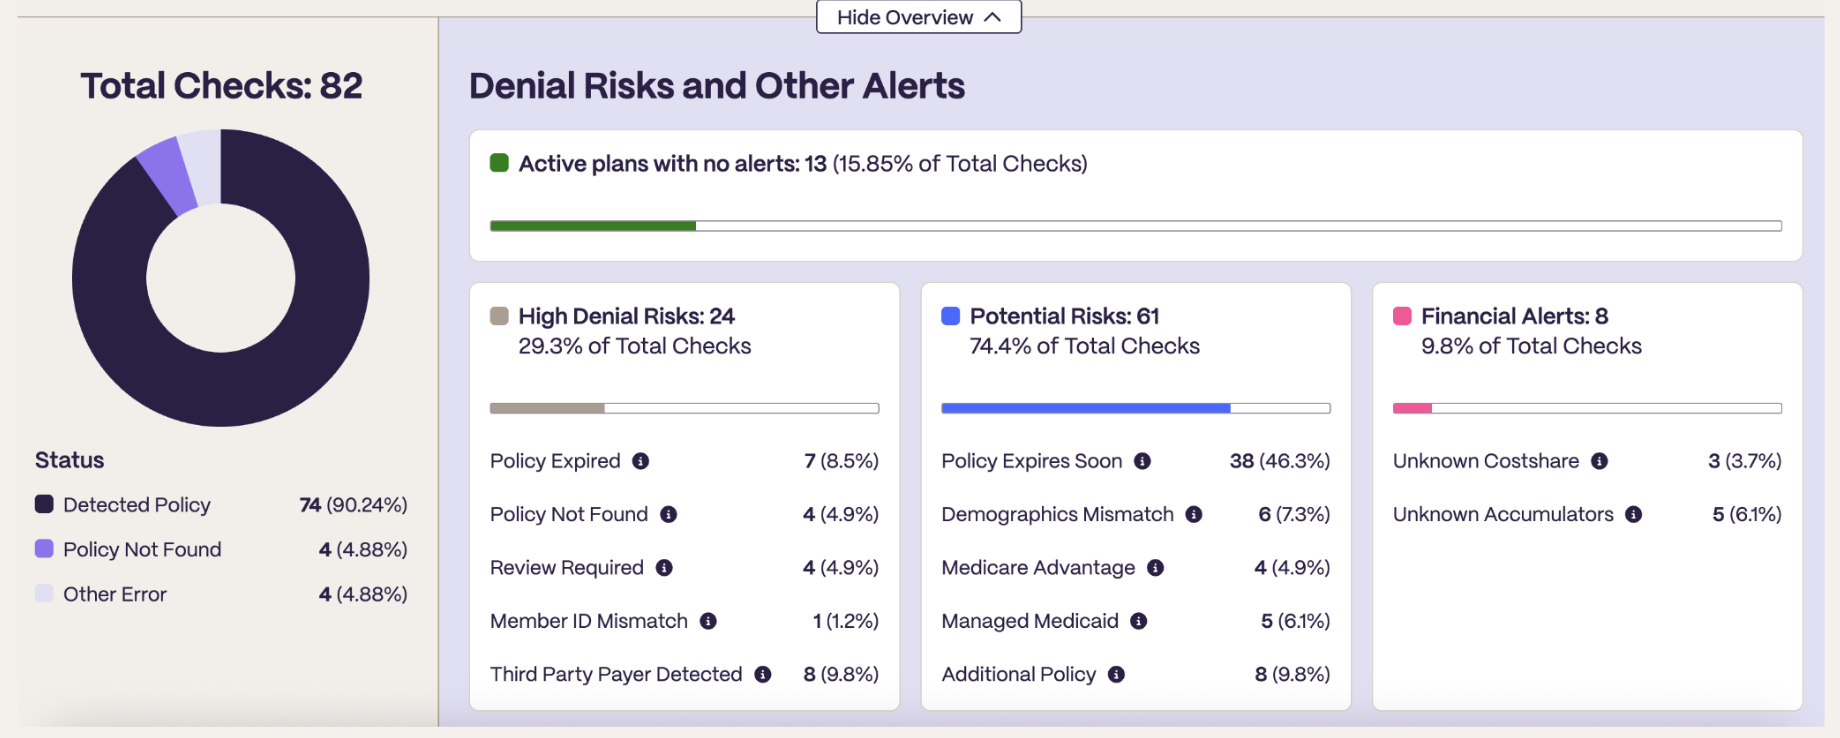
On the left-hand side of the visualization, you'll get a breakdown of the overall API performance over the time period in the "Total Checks" section. You'll have a breakdown of checks by status:
- Detected Policy — Any check for which we were able to detect the member's insurance (Status Codes: 200 or 206 from our API).
- Member Not Found — Checks for which the payer has no record of the member ID and DOB combination (Status Code: 404).
- Other Error — Checks for which we were unable to locate insurance benefits (Status Codes: 400, 422, 429, 500, 502).
For more information about error codes, please refer to Nirvana's API documentation.
On the right-hand side of the visualization, you'll see a breakdown of your checks by Denial Risk and Other Alerts:
- Active plans with no denial risks — Plans for which we located the policy, retrieved financials, and the policy was still active at the time of the check.
- High Denial Risks — Checks we recommend your team reviewing and taking some action on to mitigate denial risks. Alerts include:
- Policy Expired — The policy has termed and is no longer active.
- Policy Not Found — Calls where the payer has no record of the member ID and DOB combination. Review the member information and resubmit the check.
- Review Required — Calls where Nirvana was unable to locate the insurance policy. Recommended to run a manual check.
- Member ID Mismatch — A different member ID was detected than the one provided. Recommended to confirm with the patient and update.
- Member DOB Mismatch — A different member DOB detected. Confirm with the patient and update.
- Third Party Payer Detected — Third party administrator or carveout detected. Recommended to confirm whether or not your claim should be filed to this administrator.
- Credentialing Error — The payer does not recognize the provider NPI. Recommended to reach out to the payer to get credentialed.
- Enrollment Required — The payer does not have explicit enrollment with this NPI. Please contact Nirvana support to assist in enrolling this provider.
- Potential Risks — Checks which we would recommend reviewing, but may not necessarily lead to a claim denial.
- Policy Expiring Soon — The plan end date for this policy is within the next 30 days.
- Demographics Mismatch — We were able to locate the insurance policy, but the payer returned different demographic information than what was inputted to make the check.
- Additional Policy Detected — We detected that this patient has another insurance policy (i.e. a secondary plan) that may be considered for coordination of benefits.
- Medicare Advantage — Medicare Advantage plan type detected.
- Managed Medicaid — Managed Medicaid plan type detected.
- Financial Alerts — Checks for which we were unable to recover full financial information.
- Unknown Costshare — We were able to find the policy and whether it is active, but were unable to return the costshare (i.e. copay, coinsurance).
- Unknown Accumulators — We were able to find the policy and whether it is active, but were unable to return the accumulators (i.e. total/remaining deductible, total/remaining out-of-pocket max).
- OOP Max Met — Policies for which the out-of-pocket maximum has been met.
- Deductible Met — Policies for which the deductible has been met.
Filtering
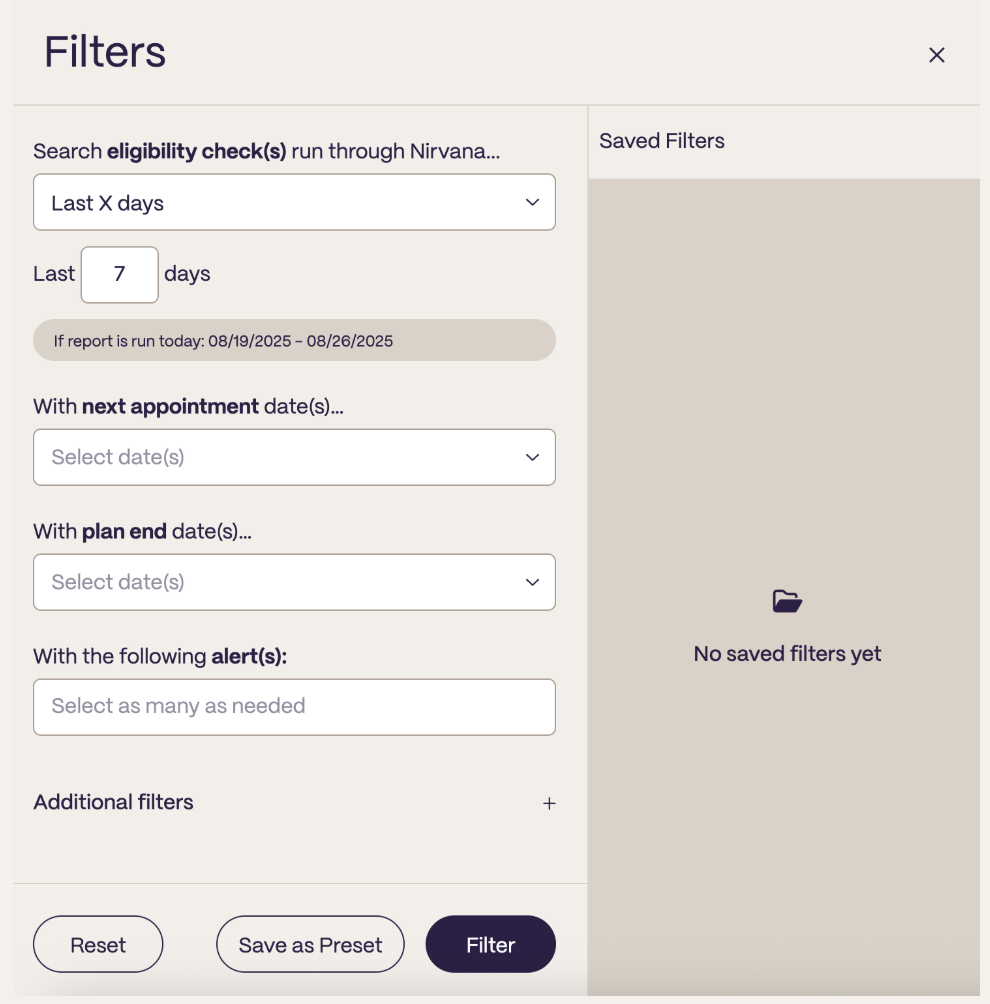
Selecting a filter will bring out a pullout tray from the left. From here you can customize the view by various date values, alerts, plan details, and more. You can filter by Patient ID, Patient Type, Group ID, Group Name, Plan Type, Plan Name, Payer ID, and Insurance Type. The reports view shows the most recent check for a given policy based on the filters you apply.
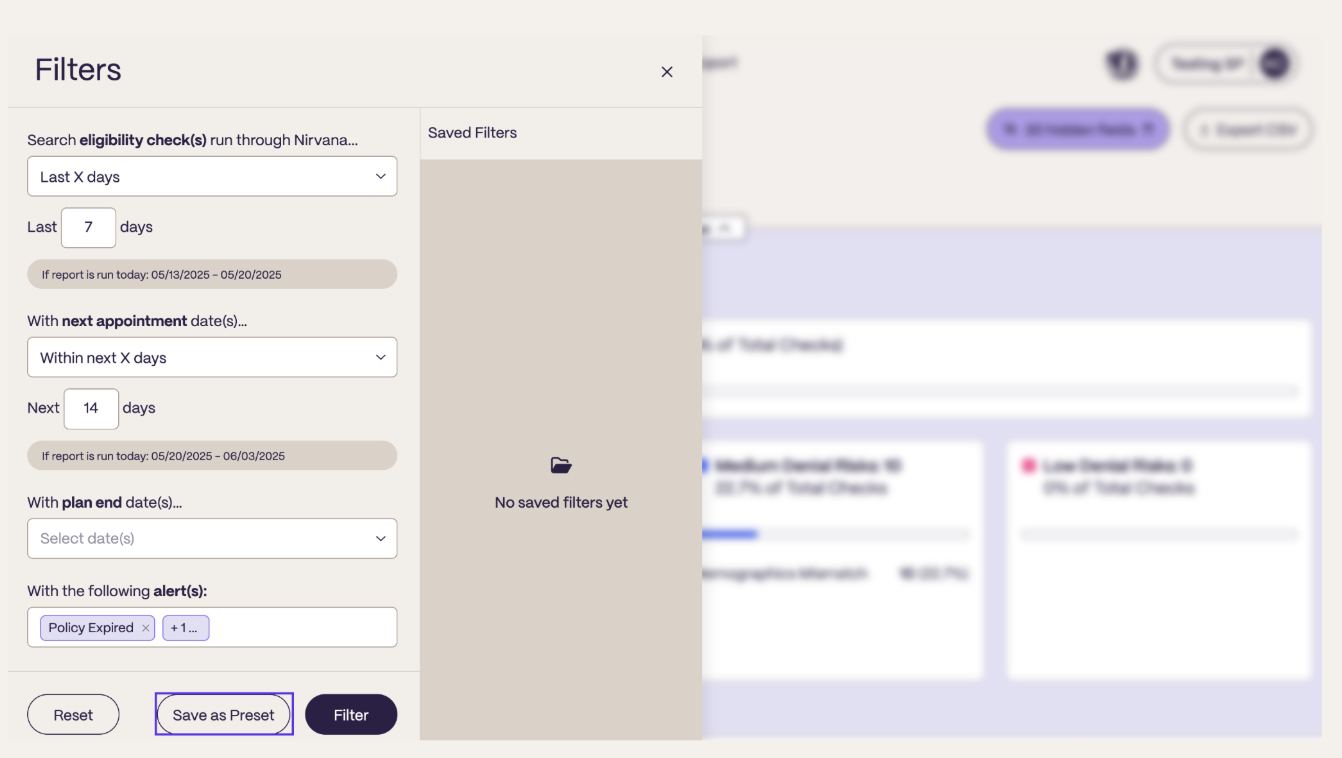
Saving a Report
Once you have a report configured for your workflows, you're able to save the report by saving it as a preset. This ensures that you'll be able to pull a consistent report to send to your team:
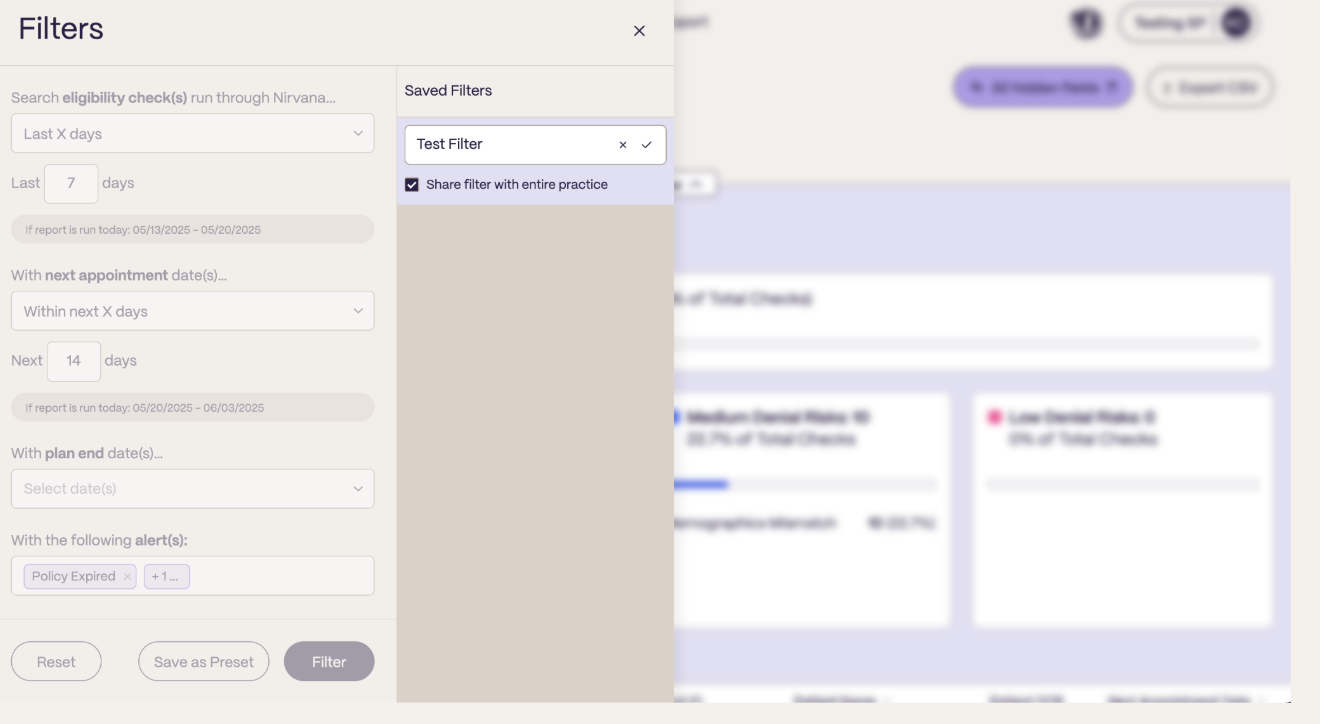
Once you click "Save as Preset," you'll be able to name your filter, and share it with the rest of your practice if you'd like others to have access to the same set of filters:
Sorting and columns
Once you've filtered your report down to the policies you'd like to view, you can also choose which fields you'd like to display on your report using the "Hidden Fields" button at the top right:

You can display any of the fields listed (which mirrors our API response), and also set the column order by moving the column directly in the UI. When you set an order of columns, your preset column configuration will load the next time you return to the Reports tab.
You can also sort by a subset of the fields in the Reports tab. These include (but are not limited to):
- Alert(s) — Ordered by severity
- Patient Name, Plan Name — Ordered alphabetically
- Next Appointment Date, Date (date the API call was made) — Ordered by date
Exporting a CSV
You can export your report results using the "Export CSV" button at the top right corner of your screen. Exporting a report will download the full list of results, not just the paginated results shown on the screen.
You have two options for exporting CSVs: Export to Email, and Export Now.
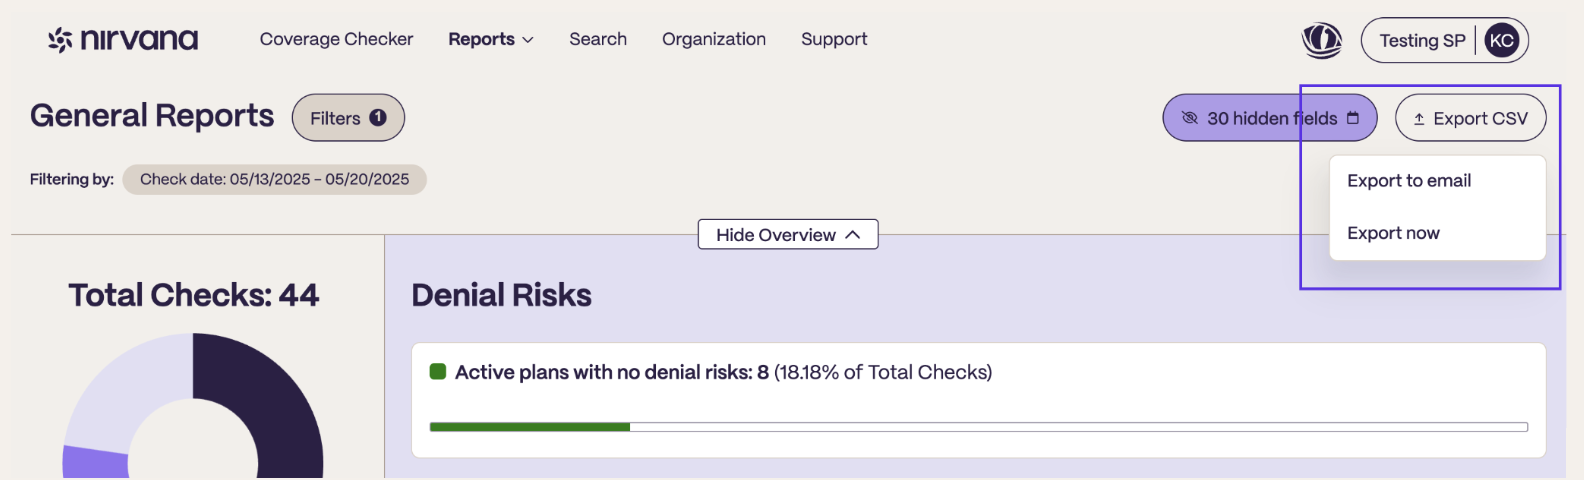
- Export to Email enables you to run the CSV export job in the background and have it emailed to the email address associated with the account. This ensures that you can continue on with your work without waiting for the CSV export to complete.
- Export Now exports the CSV immediately to your downloads. Please note that you'll have to keep the screen open as you wait for the export to finish generating.
Medicaid Reports Page
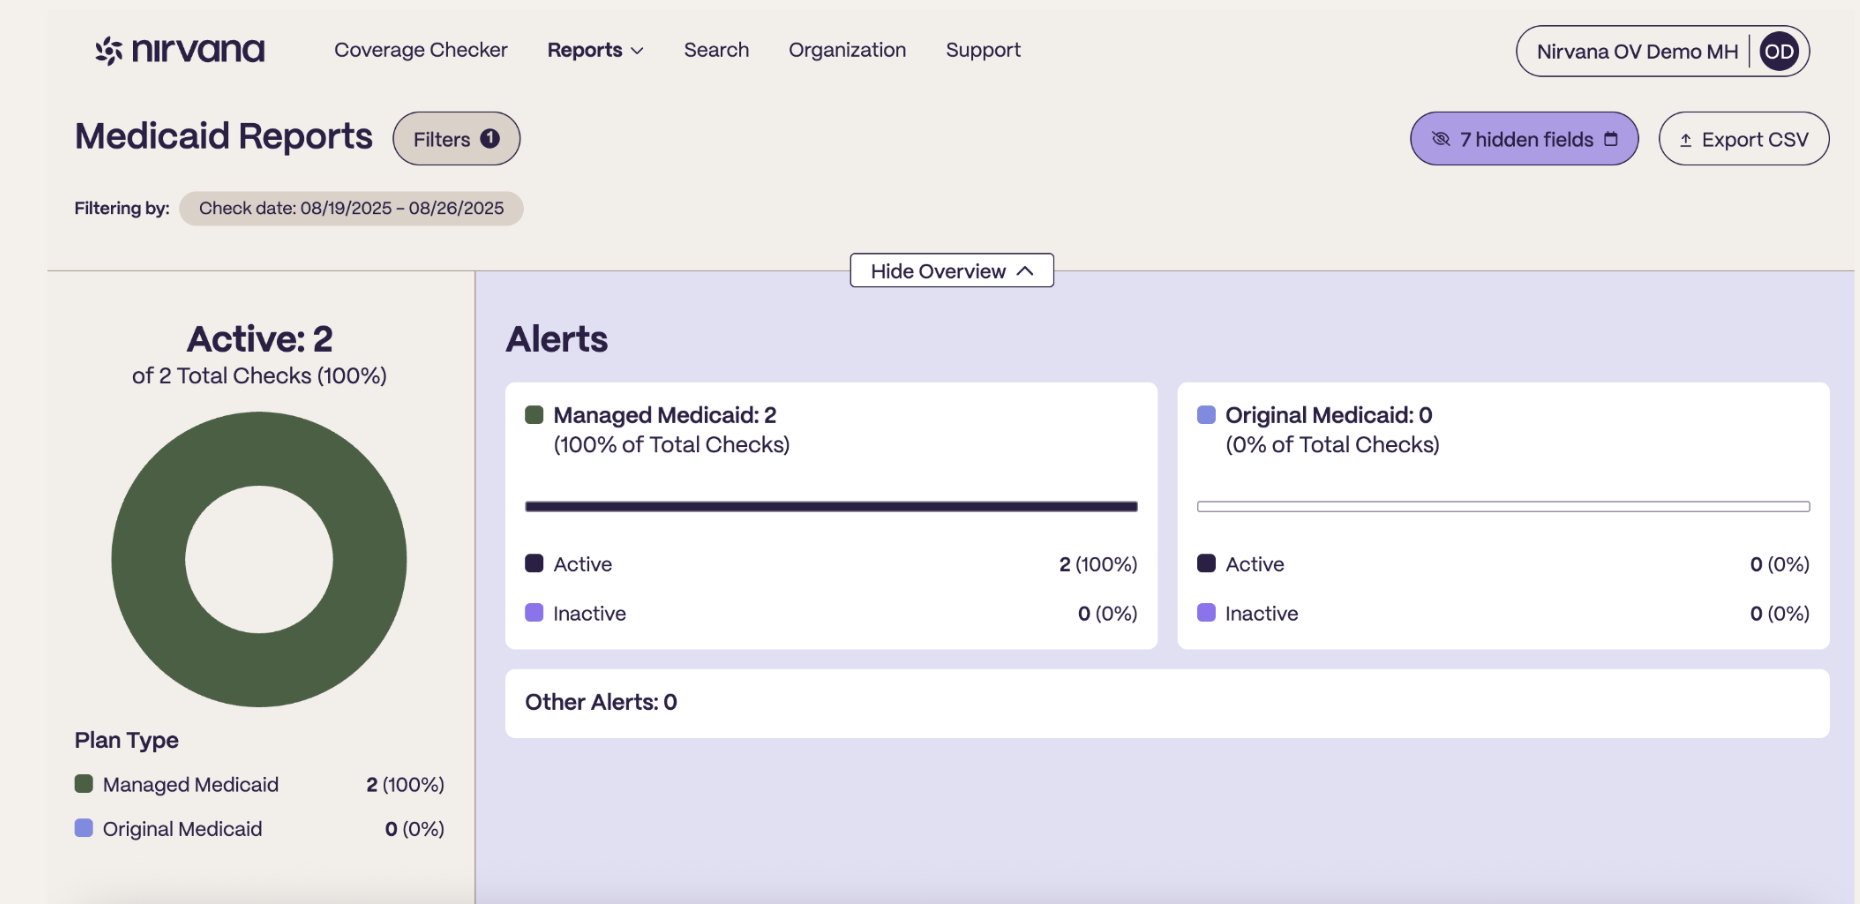
Under the Reports navigation, if your organization has the Medicaid product enabled, you will have the option to see the Medicaid Report page. The functionality is analogous to the general reports (e.g. filters, saved presets, similar alerts, customizable columns, CSV export). The main difference is that the Medicaid Report only shows verification checks run through the Medicaid API or the Medicaid check type in the Coverage Checker (single or bulk).
Updated about 1 month ago